I
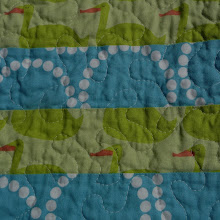
love my new bag. I don't know what I love the most about it - the Lizzy House Red Letter Day Fabric (ducks in a row), the stripey lining and handles, the internal zippered pocket (first one I've sewn!), or the amazingly endless bottomless pit that will fit everything I need inside.
I needed a bag to throw everything into for the days that I casual teach, and for the outings with the kids that require food, extra nappies, etc. I thought this pattern was perfect. It's the
Left Bank Granny Bag from the book
Carry Me, by Yuka Koshizen.
The book's a bit intimidating - it's translated from Japanese and most of the instructions are in diagrams, with only minimal words. There were no full-size pattern pieces for this bag, only schematics to measure and cut out each rectangular piece. But having good maths skills I thought I'd give it a try.
I made a few modifications and had to improvise a couple of times where the pattern seemed a bit lost in translation. I'll try to describe them here for anyone planning to use this pattern:
- My bag is an inch or two shorter - this way I could squeeze it out of my one yard of ducks in a row fabric. Basically, I cut the width as per the pattern for the entire length of my piece of fabric and squared it off.
- I cut my outer piece in half and pieced it so the ducks were right-side-up on both sides :)
- The straps were cut from my lining fabric as I wanted to use the stripes. But if you only have 1 yard of each fabric I think you need to use the lining fabric anyway (unless you piece the outer fabric to get the right length).
- The pattern has you cut interfacing out for the pocket, but never tells you where to use it. I fused it to the wrong side of the lining fabric, where the pocket gets sewn on.
- For the gathers and pleats at the top, the pattern instructs you to randomly sew pintucks. I couldn't see any pintucks in the photo, so I'm not sure if that's what she meant. This is what I did: I 'basted' 7 large tucks (about 1 cm wide), evenly spaced across the top, using my maximum stitch length. I finger pressed them toward the outside of the bag. Then I sewed my gathering stitches and gathered to match the top panel width. Once I completed the bag I ripped out the stitches holding the tucks as well as the gathering stitches. If I did this bag again I'd sew some more tucks (about 1 inch apart instead of 2) before gathering.
- After top-stitching the top panel, I slip-stitched the inside seam to add strength and neaten the edge.

I grin whenever I see this bag and look forward to using it all the time! I would definitely make another one.




 Posts
Posts

