Pages

Sunday, January 16, 2011

free as a bird gypsy skirt

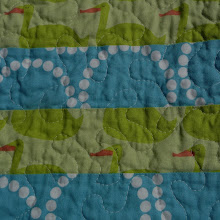
I've been resisting the urge to purchase some of MoMo's Freebird fabric pretty much since it was released. So I was delighted to have an excuse to buy some - I just didn't have the right fabrics, or the right quantities of the right fabrics, in my stash, to make a cute skirt for a two-year old. So I was off to a new-to-me fabric shop, where I bought a few bits of Freebird, and whipped up this cute skirt in two evenings:
Pattern: Gypsy Skirt, from Making Children's Clothes by Emma Hardy
Size: 2-3 years
Fabric: Freebird by MoMo (Moda)
Modifications: instead of adding ribbon, I topstitched along the bottom edge of each layer.
Yay! I love how the colours work together (something I'm not always good at choosing). The pattern was straight-forward and easy - just lots of patience and time to get the gathers right.
The birthday girl wanted to put it on straight away. Here she is looking beautiful and pensive:
And holding a balloon. What could be better than a balloon and a new twirly skirt?
Happy Birthday Lila!

Saturday, January 15, 2011

Cute!

I was introduced to Noodlehead and lil cutie pouches by the comments on my giveaway post. I just had to whip up some myself!
I used Bloom and Grow fabric by Riley Blake for the exteriors - I love these prints, especially those dots. The interior is a lovely turquoise blue kona solid, but I just couldn't photograph it well. The tabs are scraps from Modern Meadow and Red Letter Day. The one with dots is for me and the other is part of a belated Christmas present for a friend.
I do like them, but they are rather small (my phone doesn't fit). I think I'll use mine when I go to the pool for a swim, something I aim to do more often this year!
While I was scouring my stash for cute fabric combos, I stumbled upon this:
It looks even better in person! I foresee a cute little pleated tote - with the dots across the top and for the handles, and the peeps (from Lizzy House's Castle Peeps line) as the main body. The dots coordinate well with the whole colourway from Castle Peeps - wouldn't it make a cute playful twirly skirt for a little girl?

Thursday, January 13, 2011

Flood Relief

I'm having trouble writing this post and putting things into words, so I'll just direct you to make it perfect, who is doing an outstanding job of communicating about the floods. She is also coordinating online auctions for handmade items, with all proceeds going to flood relief. So head over for a look. The master auction list will be posted on Monday. Get in touch with her immediately if you'd like to host one yourself.

The Queensland Goverment has also put up this site with information about how to donate to the flood relief appeal.

Edit: I forgot to mention that I don't live anywhere near the flooding. However, I can't imagine that there is a single Australian (as well as many around the world) who doesn't know at least one family affected.

Monday, January 10, 2011

Popular Pattern Links

From over 700 comments left on my giveaway post, here are the links to the twelve most popular designers and bloggers, as recommended by you.

Please note: I've provided links to where I thought it was easiest to find the patterns or tutorials. Often they're listed as links along the sidebar of a blog. Any troubles, let me know!

Amy Butler - patterns for clothing, bags and other accessories - her bag patterns are particularly popular. The Anna Tunic is on my to-do list:
Elizabeth Green-Hartman (Oh, Fransson!) - patterns and tutorials for quilts and small projects, including the Mod Sampler Quilt-Along:
Made by Rae - tutorials and patterns for bags, quilts and baby clothes. The Buttercup Bag is a big hit.

Noodlehead - tutorials for various small and cute projects. The gathered clutch is a favourite. I have no idea how I didn't know about this blog! I've already made a couple of lil cutie pouches:
Oliver + S - clothing patterns for children and babies. Personally, I love both the finished product and the patterns - the patterns leave no questions unanswered. Here's an Ice Cream Dress that I've sewn:


Moda Bakeshop - wow! I really haven't explored this site enough. It has patterns for everything using all types of Moda precuts.
Cluck. Cluck. Sew - mostly quilt patterns and an entertaining blog.
Made (dana made it) - another site I can't believe I missed (thanks for the tip!). Full of a broad range of patterns and tutorials from clothing to accessories to home decor.
Sew Liberated - patterns for clothing and accessories, including the very popular Schoolhouse Tunic. There are also tutorials listed on the sidebar.
Ottobre - a magazine from Finland featuring patterns for kids
Anna Maria Horner - this talented woman designs patterns as well as fabric - including clothing and bag patterns, free quilt patterns, and two great books.
Pink Penguin - another blogger I somehow missed - great tutorials for really cute accessories.


Phew! That is quite the list, but I couldn't finish without mentioning some talented and popular Australian designers that I think everyone should know about:
Make It Perfect - great looking clothing patterns for women, girls and boys.
Kate Conklin - beautiful quilt patterns and tutorials, often made using great modern Australian quilt fabrics.
Red Pepper Quilts - Truly inspirational. I'm always amazed by her fabric choices, detail, accuracy and beautiful quilting. Click on patterns on her blog sidebar to view her quilt patterns.

Lastly, since it's one of my main interests, here are a few children's clothing designers introduced to me through your comments:
Heidi and Finn
Leila and Ben
Little Lizard King - and I won her Sew Mama Sew giveaway! I got to choose a pdf pattern for free - I chose the Elizabeth Claire Peasant Dress

Well, there are certainly enough links, projects, tutorials and patterns there to keep you busy for a lifetime. However, if there's interest, I'll write another post with links to more of the designers and bloggers you recommended in those giveaway comments. I can't promise that it will be as thorough as this post!

Hope you find some inspiration in these links. Happy Sewing!

Friday, December 31, 2010

Gift #2 - for a first birthday

OK, this one is nearly a week late, but it's done now and off to the birthday girl tonight!
The pattern is Gracie by Sandi Henderson (Portabellopixie). I made version A, a reversible jumper, in size 12-18 months. The main fabrics are both Wildwood by Erin McMorris, and for the yoke I used those gorgeous pink honeycombs from Modern Meadow by Joel Dewberry. I really love how they work together, especially with the trees.
The jumper went together quickly, but I'm glad it wasn't one of the first garments I'd sewn - whereas Oliver + S patterns tell you exactly what to do at every step, this pattern left off a few basics. Some of the things I did that the pattern didn't mention include: trimmed all seam allowances to 1/4 inch; added some iron-on interfacing along the back edges for the button holes and buttons; and clipped the seam allowances for smooth curves.
Do you like the big green buttons? I love them! They were from my stash so I was amazed how well they matched.

Hope the birthday girl (and her mum) loves the new dress!

Wednesday, December 29, 2010

Well, at least one gift got finished on time...

And it wasn't even a Christmas present! This blouse was made for my girlfriend's daughter's 2nd Birthday. I finished hand stitching the bias edges on the sleeves, wrapped it up, and went to the party.
I used the Oliver + S 2+2 blouse pattern, size 2, short-sleeved version. The main fabric is MoMo Wonderland and the contrast is from Joel Dewberry Modern Meadow. I love those honeycombs!
As I am still quite new to sewing, this project, again, had lots of firsts: first time cleaning and oiling my machine (so not as scary as I thought); first time sewing buttonholes (wow, not hard!); first time making lots of my own bias tape (fiddly, yes, but definitely easier having rotary cut the strips); first time using fabric from, gasp, not the same fabric line (still not too sure how much I like this combo).

This took a lot longer than I expected to sew, as it was quite fiddly throughout, and many seams were ripped and redone. However, those concise and well-illustrated Oliver + S instructions made every step clear. Overall, I'm happy with the result. I look forward to seeing it on its recipient to make a final judgement.

Tonight, I worked another baby birthday present and am nearly done. Next up is a belated Christmas present - another Left Bank Granny Bag. And yes, I still plan to post those links to all the amazing patterns recommended during the giveaway. In the meantime, I'm using all my inner strength to resist buying some of this (already sold out at Hawthorne Threads but still available at fabricworm):

Monday, December 20, 2010

Smashed Grapes - Free Fingerless Mitts Pattern

I've been a bit neglectful of both my knitting and my knitting friends. So please, have a free knitting pattern. The pattern is shown below and is also available as a free download on Ravelry. If you're not on ravelry and would prefer a pdf of the pattern, leave me a comment with your email address and I'll email it to you.


With many thanks to 1funkyknitwit
test knitter and photographer

Smashed Grapes 


I have quite a few pairs of fingerless mitts. This is the pair I put on when I need free movement of my fingers. They add a bit of warmth and style while you drive, type, or hang out the washing. This simple mitt pattern, with a thumb gusset, is knit the same for both hands. They match the Berry Bramble Hat by Cosette Cornelius-Bates (cosymakes), using the same moss stitch pattern on the cuffs as for the hat brim. While this pattern is written to be knit using the magic loop method or 2 circulars, it could also be knit on double pointed needles by dividing the stitches equally amongst 3 needles. They can easily be knit 2-at-a-time.

Size
Women’s S (M, L)
Materials
Malabrigo Merino Worsted: 100% merino wool, 192m per 100g skein; 1 skein; shown above in Velvet Grapes colourway; shown on cover in 1funkyknitwit’s handspun
1 x 4.5 mm (US 7), 40” circular needle for magic loop OR 2 x 4.5 mm circulars OR 4 x 4.5 mm double-pointed needles
4 stitch markers (only 2 required if knitting one-at-a-time)
Approx 24 inches smooth waste yarn in a contrasting colour
Tapestry needle
gauge
18 st = 4 inches
Pattern Notes
pm – place marker
sm – slip marker
m1L (make 1 left-leaning stitch) – insert left needle from front to back, under the strand of yarn between the last stitch on the left needle and the first stitch on the right needle; knit this stitch through back loop.
m1R (make 1 right-leaning stitch) – insert left needle from back to front, under the strand of yarn between the last stitch on the left needle and the first stitch on the right needle; knit this stitch.

Directions
Cast on 32 (34, 36) stitches. Divide equally and join to knit in the round.
Cuff
Rounds 1-2: *k1 p1* repeat
Rounds 3-4: *p1 k1* repeat
Repeat these 4 rounds once more, for a total of 8 rounds.
Knit 8 rounds stockinette.
Thumb Gusset
Next round – Begin thumb gusset: K16 (17, 18) pm m1R on the first needle, then K1 m1L pm K15 (16, 17) on second needle.
Knit 2 rounds stockinette.
Next round – Thumb increase: K16 (17, 18) sm m1R K1 on first needle, then K2 m1L sm K15 (16, 17) on second needle.
Continue to increase in this manner, every 3rd round, until there are 15 (15, 17) thumb stitches between the markers. Note: the increases are always immediately after the first marker, and just before the second marker.
Next round: K16 (17, 18), transfer 15 (15, 16) thumb stitches to waste yarn, cast on 1 stitch in the gap (backward loop method) on the second needle, k15 (16, 17).
Knit 7 more rounds stockinette.
Decrease 2 stitches in the next round as follows: k2tog, knit to end of needle; k2tog on second needle, knit to end (30, 32, 34) stitches.
Cuff
Knit 8 rounds of moss stitch as described under first Cuff section.
Cast off in pattern.
Thumb
Pick up the 15 (15, 17) stitches from the waste yarn and then pick up 3 more stitches in the gap. 18 (18, 20) stitches.
Divide stitches evenly and knit 4 rounds of stockinette.
Cast off loosely.
Weave in ends and block if desired.

Related Posts with Thumbnails