Pages

Showing posts with label first quilt. Show all posts

Tuesday, July 13, 2010

My First Quilt - FINISHED!

Basting...a couple of hours quilting...a day or so of indecision...an hour and a half of ripping out stitches...a few more hours of quilting...machine-stitching binding...hand-stitching binding...a wash and a dry...rainy day photos...

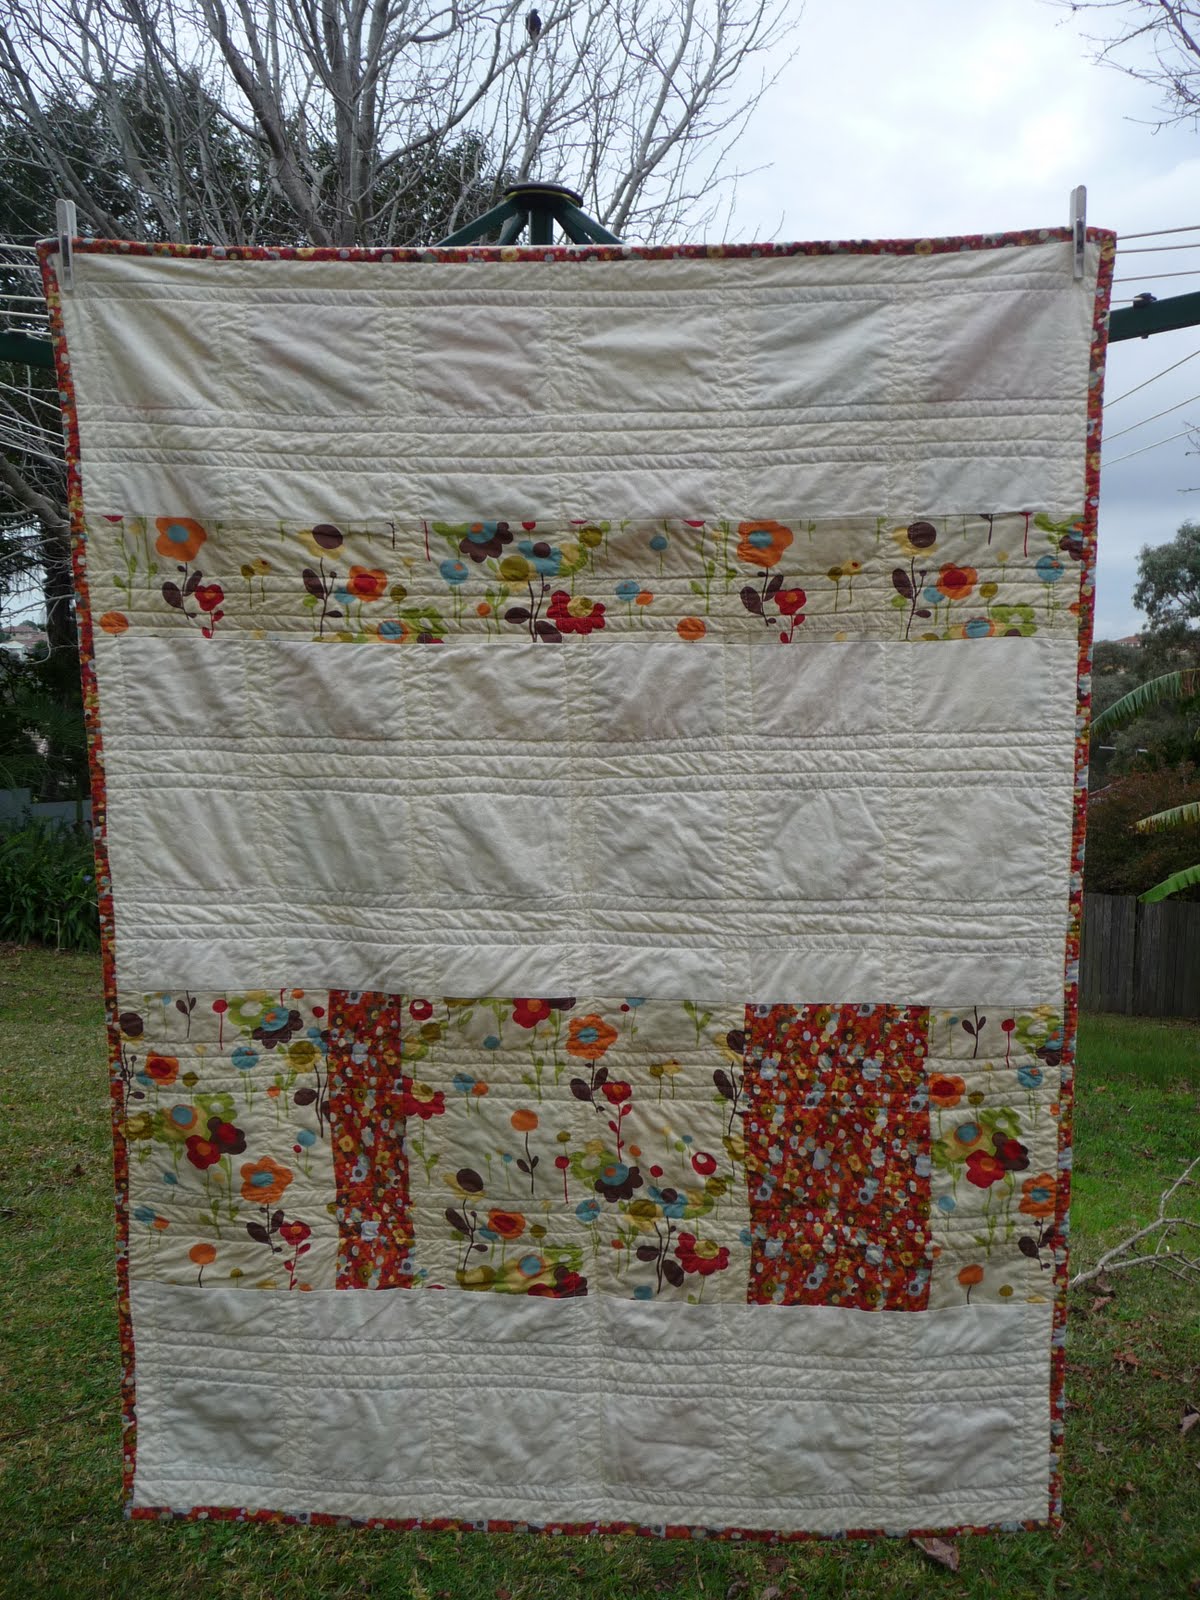
At last, my Wonderland Quilt is finished. It's a 'crib-sized' quilt, about 38" x 50", for my baby girl's first birthday in August.

Here's the front:


And the back:

And a close-up of the binding, made using that first piece of quilt fabric (Tweedle Dee in tomato) I ever acquired, as a gift from a friend:
After ripping out a lot of stitches and then re-quilting, I arrived at an amount of distortion and puckering that I think is acceptable, even to my perfectionist self. I think realism reigned, and I had to accept that there were going to be some imperfections, especially using a normal presser foot.

And, I will do it all again. I've already designed and started cutting for my next quilt - a single (twin) bed quilt for my son, using Riley Blake Wheels fabric. It's been really fun involving him in the fabric choice and design process. But that's for another post.

Tuesday, June 29, 2010

My First Quilt - Part IV

A Progress Report

I've made some progress on my Wonderland Quilt. I finally stitched the border on the quilt front:


And I've pieced my quilt back (sneak preview below) and prepared the binding (out of that first inspirational piece of tweedle dee in tomato):


I've got the batting, basting pins, and masking tape ready. Now I'm just waiting for a quiet day (preferably without the kids) to baste. But I'm quite nervous to start quilting. I plan to machine quilt but don't have a walking foot (I can't commit to buying one yet). Any tips? I plan to quilt as in this quilt.

Thursday, June 17, 2010

My First Quilt - Part III

I've nearly finished the quilt top and I love it!


I was surprised that I enjoyed sewing this so much - not even the pressing of seams was tedious. It was a joy to work with each little square. And I only needed to rip out about 4 seams (when my second strip came out about 1/2 inch longer than the first!). Of course the squares don't always align perfectly but I can live with that. Here's one of the better 'intersections':


Now all I have left to do is:
  1. Finish the quilt top by adding the border strips
  2. Design and piece the quilt back
  3. Baste
  4. Quilt
  5. Bind
So it should definitely be finished by next winter.

Tuesday, June 8, 2010

My First Quilt - Part II

Last night I arranged 48 Wonderland charms on my dining room table. They're on top of the fabric I'll use for the sashing, but the sashing will be wider (1.5") - I just didn't have enough room anywhere. Here's what I came up with:


I arranged the blocks quite deliberately. With my minimal knowledge of colour theory and design I divided the charms into 3 groups:
  • light - cream background
  • medium - green, blue, pale pink background
  • dark/bright - red, bright pink, brown background
Next I started to place them one by one (starting at top left and winding down row by row), choosing from the pile I thought best at the time. As much as possible, I also alternated, checkerboard style, between the regularly patterned blocks (butterflies, scissors, dots, etc.) and random blocks (floral, etc.). For the 8 extra blocks I needed from my second charm pack, I chose the blocks that I also have in yardage. A few snapshots and a few swaps of blocks led to the final arrangement above.

I noticed that I'd placed most blocks that were directional right-side-up - as if the quilt had a top and bottom. I randomly changed some to see which I prefer. Here are the two side by side:


So the big questions are:
  1.  How's my layout? I want the eyes to travel all over the quilt and not just focus on one part. Are there any squares I should swap around to better achieve this?
  2. What about the orientation of the squares? Random or all in the same direction? Can you even tell the difference between the two above?
Remember, this is my first quilt, so I'd love all and any advice!

Monday, June 7, 2010

My First Quilt - Part I

I began writing this post and then realised that I was writing about my process. I've therefore decided to take the Process Pledge:

The Process Pledge

I've been thinking about my first quilt for some time now (at least 6 months). I've spent lots of time browsing Flickr and blogs and then daydreaming about how I could best use my Wonderland charm squares. Some of my favourite Wonderland quilts are below:


Although I love the idea of 1.Untitled (could make with my charms and honey bun) and 5. quilt front, I've decided to do a sashed quilt like 4. Gingham in Wonderland. I think the best part of a quilt made with this fabric is the fabric and that the sashing really frames each little work of art. As for the other two that I like, well, I think for my first quilt I should stick to some basic piecing.

The next step was working out how big to make the quilt and how wide to make the sashing. This is for a cot quilt for my beautiful daughter, and some Internet research said some common sizes are 36" x 48" and 40" x 52". As for the sashing, the quilts I liked the best on Flickr had a ratio of about 5":2" in width, including the seam allowance. Thus the blocks with turn out to be 4.5" square and the sashing will be 1.5" wide. A bit of maths led to deciding on the final size: 6 charms x 8 charms = 38" x 50" quilt.

Next is arranging the 48 charms out before sewing, but I'll leave that for another day.
Related Posts with Thumbnails