Pages

Showing posts with label momo. Show all posts

Tuesday, April 10, 2012

I'm so excited! I'm so excited!

That's what my daughter exclaims just before lifting a flap in a lift-the-flap book. It's also how I feel about Wollongong getting its own Modern Quilt Guild! Unfortunately, I've missed out on the first few meetings (things like my son's 5th birthday party getting in the way), but the coordinator has been excellent about communicating with me and invited me to participate in the group's first charity quilt. Here's my contribution:
I was sent the pink squares and added the rest from my stash. We were asked to add jewel tones from our stash and use this tutorial to make a 12.5" wonky star block. I love using scraps from special projects - all three were used to make a dress or skirt. I hope I've done it justice!

When I go to my first meeting later this month, I plan to sew lots of half square triangles to start my daughter's quilt. She was very interested when she saw me laying out the squares for Joseph's quilt:
We looked at fabrics and patterns together and she was very opinionated - It's a Hoot for the fabric, and pinwheel blocks with no sashing. That's a lot of half square triangles!
Luckily, I have lots of It's a Hoot fabric - 2 charm packs, 5 fat quarters and some yardage. That should be enough for the pinwheels, one or two borders, binding, and a pieced backing (I'm making a single/twin quilt). Last night I cut 88 5" off-white squares.

Can't wait to start sewing!

Sunday, April 8, 2012

Whipped up...

So I've been sewing long enough now to have the skills and speed to 'whip something up'. It's great to actually be able to sew something in less than an hour, albeit basic. I have two items I made for gifts to share:
The first is a simple skirt made gorgeous with one of my favourite fabric lines - It's a Hoot by MoMo. I based it on the Lazy Days Skirt free pattern by Oliver + S, but did a basic hem it instead of using a ribbon. It's for a friend of my son's 5th birthday - Mum requested no presents but mentioned that handmade is good. I hope she likes it!
For a size 5 I used a 16" width-of-fabric strip and a 20" length of elastic.

The second gift is a portable change mat for a friend who just had her second baby. This one took a bit longer, but probably still under 2 hours.
I no longer have the pattern for it (it was either out of a Lotta Jansdotter or Amy Butler book), but it's simple so I just measured mine. I used some Denyse Schmidt County Fair home dec weight for the outside and some Denyse Schmidt Spotlight/JoAnn's Fabric for the inside. Don't they coordinate well?


I did some basic diagonal quilting following the pattern of the fabric. Have I mentioned yet that I LOVE my new walking foot?!! It made the quilting super easy and quick.
So I've made heaps of things that I haven't blogged about yet. I'll try to catch up! Overdue and upcoming blog posts include:
  • The flower girl bubble dress
  • Castle Peeps placemats
  • Lego Birthday Party
Wishing everyone a Happy Easter, Pesach, etc. Don't eat too much chocolate!

Friday, January 21, 2011

jill in wonderland

I never expected to sew clothes for myself. Sewing for kids is, after all, much more forgiving - they still look cute in something obviously handmade, they don't have figures to fit, and elastic waistbands are the norm. But after honing my skills on lots of little projects (and a couple of small quilts), I jumped in the deep end and made this:
Pattern: Souffle Skirt from Make It Perfect by Toni Coward
Size: Medium
Fabric: Wonderland by MoMo (Moda)
Modifications: I didn't add a contrast band at the bottom, as I didn't want to draw away from the main skirt panel. I cut the rectangles for the main skirt a bit longer than the pattern called for to compensate (basically my one yard cut in half, so just under 18"), and simply hemmed the bottom.
It fits perfectly! And my husband gave me the ultimate compliment, saying, "you don't need to buy clothes anymore." Does this justify a fabric shopping spree?

I could wear this everyday and just stare at the beautiful Wonderland fabric. If you don't know about my obsession with Wonderland fabric, then you should read this, this and this.

Of course, I did learn a couple of things to improve on next time:
  1. Match the zip to the waistband fabric, not the main skirt fabric - that zipper pull stands out a lot!
  2. Place the zipper stops at the top, not the zipper tape! The zip stops about and inch short of the top.
At least I always wear my shirts out, not tucked in, so this gets hidden.

I was so anxious to get this photographed that I had my nearly-four-year-old try to photograph me in it. This is the result:
Not badly composed, but he got the exposure all wrong! Luckily, my husband got home with enough light out to take the second photo above.

Have you sewn any clothes for yourself recently? What did you make?

Sunday, January 16, 2011

free as a bird gypsy skirt

I've been resisting the urge to purchase some of MoMo's Freebird fabric pretty much since it was released. So I was delighted to have an excuse to buy some - I just didn't have the right fabrics, or the right quantities of the right fabrics, in my stash, to make a cute skirt for a two-year old. So I was off to a new-to-me fabric shop, where I bought a few bits of Freebird, and whipped up this cute skirt in two evenings:
Pattern: Gypsy Skirt, from Making Children's Clothes by Emma Hardy
Size: 2-3 years
Fabric: Freebird by MoMo (Moda)
Modifications: instead of adding ribbon, I topstitched along the bottom edge of each layer.
Yay! I love how the colours work together (something I'm not always good at choosing). The pattern was straight-forward and easy - just lots of patience and time to get the gathers right.
The birthday girl wanted to put it on straight away. Here she is looking beautiful and pensive:
And holding a balloon. What could be better than a balloon and a new twirly skirt?
Happy Birthday Lila!

Wednesday, December 29, 2010

Well, at least one gift got finished on time...

And it wasn't even a Christmas present! This blouse was made for my girlfriend's daughter's 2nd Birthday. I finished hand stitching the bias edges on the sleeves, wrapped it up, and went to the party.
I used the Oliver + S 2+2 blouse pattern, size 2, short-sleeved version. The main fabric is MoMo Wonderland and the contrast is from Joel Dewberry Modern Meadow. I love those honeycombs!
As I am still quite new to sewing, this project, again, had lots of firsts: first time cleaning and oiling my machine (so not as scary as I thought); first time sewing buttonholes (wow, not hard!); first time making lots of my own bias tape (fiddly, yes, but definitely easier having rotary cut the strips); first time using fabric from, gasp, not the same fabric line (still not too sure how much I like this combo).

This took a lot longer than I expected to sew, as it was quite fiddly throughout, and many seams were ripped and redone. However, those concise and well-illustrated Oliver + S instructions made every step clear. Overall, I'm happy with the result. I look forward to seeing it on its recipient to make a final judgement.

Tonight, I worked another baby birthday present and am nearly done. Next up is a belated Christmas present - another Left Bank Granny Bag. And yes, I still plan to post those links to all the amazing patterns recommended during the giveaway. In the meantime, I'm using all my inner strength to resist buying some of this (already sold out at Hawthorne Threads but still available at fabricworm):

Thursday, August 5, 2010

Fabric Finds

Is there anything more exciting than finding an out-of-print fabric that you thought you'd never get a hold of? OK, I'm sure there are plenty (a recent example - my baby girl finally started crawling, well, er, moving forward with great effort); but what great finds!

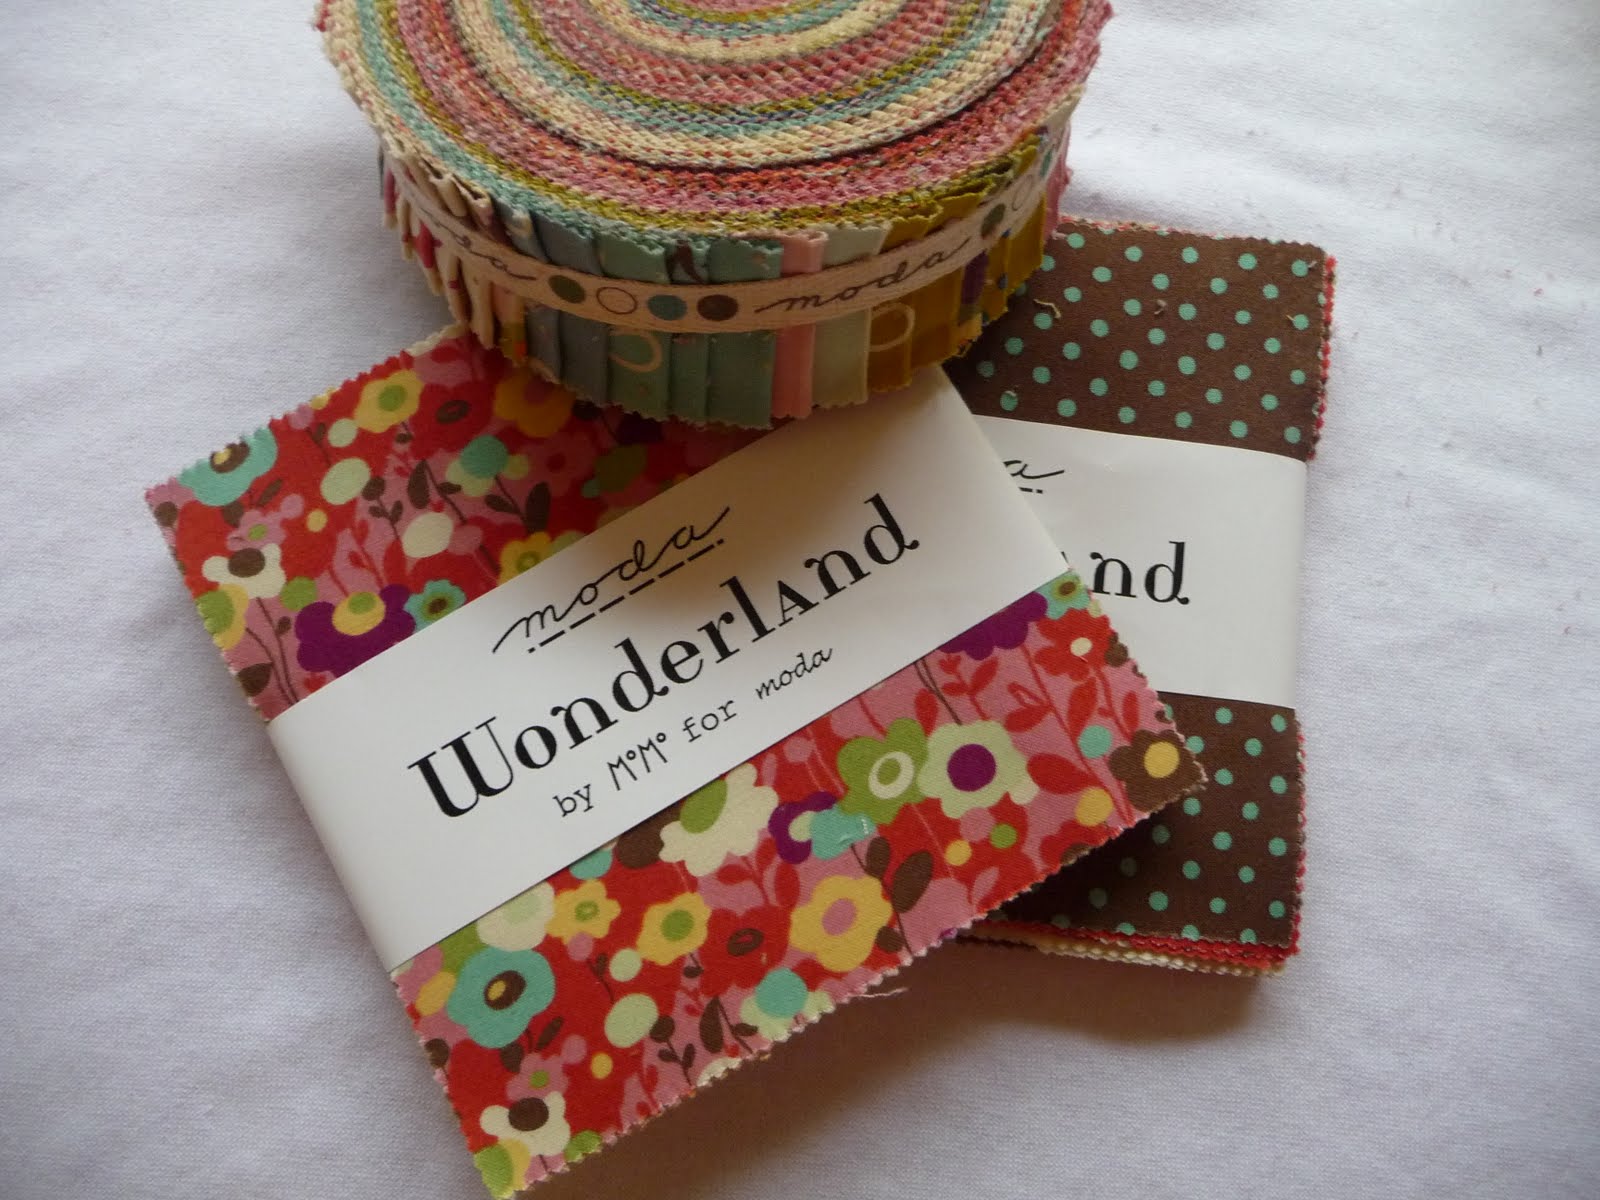
Those of you who know me know that I am a little bit obsessed with MoMo's Wonderland fabric. My first quilt was made using one and a bit charm packs. And I've previously shared my Wonderland stash with you.

I'll try to make this story short - my girlfriend was in a quilt shop about an hour's drive away and noticed some Wonderland fabrics. She excitedly rang me and brought me back a yard of the pink vine fabric you see below. I couldn't resist and drove down a few days later and acquired the rest.


From left to right: approx 2 yards; 1 metre; 1 metre; 2/3 yard; 1/2 metre; 3 x fat quarters and a 1/4 metre remnant of dots.

I was in heaven! It was a lovely shop and very bright and friendly. Mostly more traditional prints but a good selection of modern fabrics and some Japanese too! So if you're ever travelling in Australia check out Berry Patchwork Shop in Berry, NSW, about 2 hours south of Sydney.

I also picked up some great deals on lecien fabric on special...
For my first garment for me:
For Miriam's second Ice Cream Dress (View C - the blouse):

Next project is the Ice Cream Dress - fabric is washed and ready for cutting.

Tuesday, July 13, 2010

My First Quilt - FINISHED!

Basting...a couple of hours quilting...a day or so of indecision...an hour and a half of ripping out stitches...a few more hours of quilting...machine-stitching binding...hand-stitching binding...a wash and a dry...rainy day photos...

At last, my Wonderland Quilt is finished. It's a 'crib-sized' quilt, about 38" x 50", for my baby girl's first birthday in August.

Here's the front:


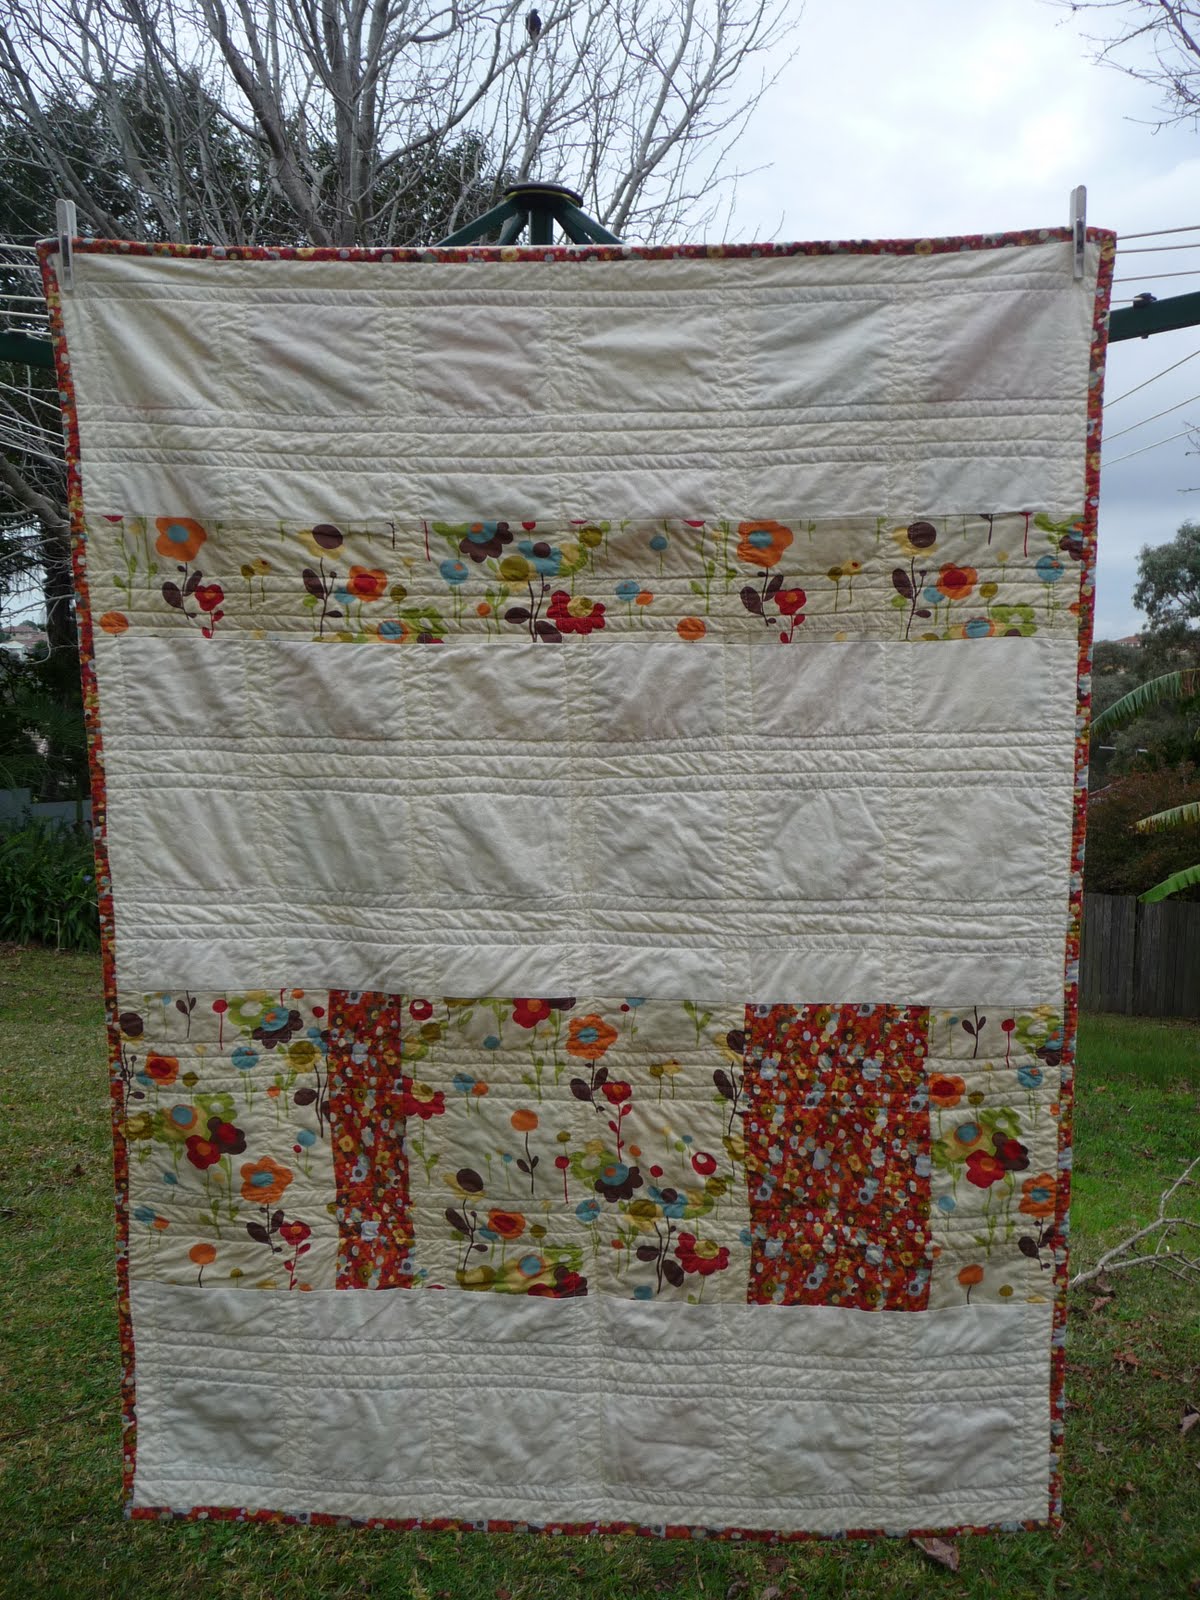
And the back:

And a close-up of the binding, made using that first piece of quilt fabric (Tweedle Dee in tomato) I ever acquired, as a gift from a friend:
After ripping out a lot of stitches and then re-quilting, I arrived at an amount of distortion and puckering that I think is acceptable, even to my perfectionist self. I think realism reigned, and I had to accept that there were going to be some imperfections, especially using a normal presser foot.

And, I will do it all again. I've already designed and started cutting for my next quilt - a single (twin) bed quilt for my son, using Riley Blake Wheels fabric. It's been really fun involving him in the fabric choice and design process. But that's for another post.

Tuesday, June 29, 2010

My First Quilt - Part IV

A Progress Report

I've made some progress on my Wonderland Quilt. I finally stitched the border on the quilt front:


And I've pieced my quilt back (sneak preview below) and prepared the binding (out of that first inspirational piece of tweedle dee in tomato):


I've got the batting, basting pins, and masking tape ready. Now I'm just waiting for a quiet day (preferably without the kids) to baste. But I'm quite nervous to start quilting. I plan to machine quilt but don't have a walking foot (I can't commit to buying one yet). Any tips? I plan to quilt as in this quilt.

Thursday, June 17, 2010

My First Quilt - Part III

I've nearly finished the quilt top and I love it!


I was surprised that I enjoyed sewing this so much - not even the pressing of seams was tedious. It was a joy to work with each little square. And I only needed to rip out about 4 seams (when my second strip came out about 1/2 inch longer than the first!). Of course the squares don't always align perfectly but I can live with that. Here's one of the better 'intersections':


Now all I have left to do is:
  1. Finish the quilt top by adding the border strips
  2. Design and piece the quilt back
  3. Baste
  4. Quilt
  5. Bind
So it should definitely be finished by next winter.

Tuesday, June 8, 2010

My First Quilt - Part II

Last night I arranged 48 Wonderland charms on my dining room table. They're on top of the fabric I'll use for the sashing, but the sashing will be wider (1.5") - I just didn't have enough room anywhere. Here's what I came up with:


I arranged the blocks quite deliberately. With my minimal knowledge of colour theory and design I divided the charms into 3 groups:
  • light - cream background
  • medium - green, blue, pale pink background
  • dark/bright - red, bright pink, brown background
Next I started to place them one by one (starting at top left and winding down row by row), choosing from the pile I thought best at the time. As much as possible, I also alternated, checkerboard style, between the regularly patterned blocks (butterflies, scissors, dots, etc.) and random blocks (floral, etc.). For the 8 extra blocks I needed from my second charm pack, I chose the blocks that I also have in yardage. A few snapshots and a few swaps of blocks led to the final arrangement above.

I noticed that I'd placed most blocks that were directional right-side-up - as if the quilt had a top and bottom. I randomly changed some to see which I prefer. Here are the two side by side:


So the big questions are:
  1.  How's my layout? I want the eyes to travel all over the quilt and not just focus on one part. Are there any squares I should swap around to better achieve this?
  2. What about the orientation of the squares? Random or all in the same direction? Can you even tell the difference between the two above?
Remember, this is my first quilt, so I'd love all and any advice!

Monday, June 7, 2010

My First Quilt - Part I

I began writing this post and then realised that I was writing about my process. I've therefore decided to take the Process Pledge:

The Process Pledge

I've been thinking about my first quilt for some time now (at least 6 months). I've spent lots of time browsing Flickr and blogs and then daydreaming about how I could best use my Wonderland charm squares. Some of my favourite Wonderland quilts are below:


Although I love the idea of 1.Untitled (could make with my charms and honey bun) and 5. quilt front, I've decided to do a sashed quilt like 4. Gingham in Wonderland. I think the best part of a quilt made with this fabric is the fabric and that the sashing really frames each little work of art. As for the other two that I like, well, I think for my first quilt I should stick to some basic piecing.

The next step was working out how big to make the quilt and how wide to make the sashing. This is for a cot quilt for my beautiful daughter, and some Internet research said some common sizes are 36" x 48" and 40" x 52". As for the sashing, the quilts I liked the best on Flickr had a ratio of about 5":2" in width, including the seam allowance. Thus the blocks with turn out to be 4.5" square and the sashing will be 1.5" wide. A bit of maths led to deciding on the final size: 6 charms x 8 charms = 38" x 50" quilt.

Next is arranging the 48 charms out before sewing, but I'll leave that for another day.

Saturday, June 5, 2010

Adventures in Wonderland

This is the fabric that started it all:


I was given 3/4 metre of this gorgeous fabric as part of a gift when my baby girl was born. This was my introduction to quilting fabric, and the concept that you could use it to make garments. What began as 3/4 metre has turned into this:


and this:


I was so pleased to find the charm packs and the honey bun online, so that I at least own a scrap of each of the 40 prints. Some creative Internet searching turned up some more yardage, but I was overjoyed with the limited reprint and picked up the larger scale prints (below) and the dots. I love these (forgive the creases):


So, what are my plans with all this beautiful fabric? Quilts, skirts, dresses, bags, you name it. In my next post, I'll discuss the quilt I plan to make. It will be my first quilt so I'm trying hard to keep it simple. Then some day soon I may actually start to sew it!

Friday, May 28, 2010

And then there was sewing...

Another pregnancy, another new craft. This time I found out that I was having a girl. I'd borrowed my mother-in-law's sewing machine to make some basics - curtains and burp cloths and snuggle blankets. But now I started dreaming of sewing cute dresses and skirts, along with all the baby accessories you need: bibs, change mat, etc. After getting the machine serviced a couple of times and putting it to good use, it is, at least temporarily, residing here. It's a gorgeous 70's orange Bernina that weighs a ton, and I love it.

So far I'd only sewn some basic items, using mediocre fabric from the local chain craft store. Then my girlfriend bought me the best type of gift for a crafter - supplies! - when Miriam was born - 3/4 metres x three different fabrics - to sew something for Miriam. Two of them were Panache by Sanae prints, the other one of MoMo's Wonderland. My love, perhaps obsession, of quilting fabric began. (Should I send her the invoices?).

I've spent quite some time, money and effort collecting fabrics from two particular lines of fabric - MoMo's Wonderland and Lizzy House's Red Letter Day (leading to the name of this blog). I was lucky enough to grab a couple of charm packs and a jelly roll of Wonderland, and a fair bit of yardage, especially once they did the reprint. With some internet searching, quilt shop calling, and swapping, I'm on my way to having at least a fat quarter of each of the Red Letter Day prints. Joy! What will I do with them? Well, I initially planned on just sewing clothes - cute dresses, etc. But now that I have a collection, I'd love to make some quilts. But that's for another day. Here are some of my creations from my meagre stash of quilt fabric.

So why start a blog now? Well, I've been looking at lots of blogs and have been inspired by them. But when I left a comment, there was no link back to me. Plus, I'll be needing some advice as I venture into designing and making my first quilts. And then, of course, I'd love to offer up some giveaways. I haven't thought of a milestone yet - maybe a certain number of posts or a certain number of followers? Any thoughts? Anybody listening yet?
Related Posts with Thumbnails